Pages

Wednesday, December 9, 2015

Vegetable Upma Recipe


Am getting carried away seeing the happiness and smiles on familiar around,
 "Joy" which comes with December.....though I have a big task in front of me, probably this month  :/
Anyways its time to forget all worries/anxieties, thanking Almighty for another year in our life that we complete this month and hope to have a wonderful New-year.
We should go in pace with the celebration and enjoy :) no matter what as "December" comes again only after a year :D


"Upma" is a very popular, easy to make South Indian Breakfast,
Recipe here has a creamy twist which will make your Upma extra rich and flavorful,
Do give it a try and you'll never be disappointed :)


Ingredients 

Rava/Semolina - 1 cup
Onion - 1/2 of One medium sized, finely chopped
Green Chili's - 3 No's
Tomato - 1/2 of one medium sized, finely chopped
Carrot - 1 medium sized - finely chopped
Beans - 4-6 no's chopped (Optional)
Ginger - 1/2 inch size Piece - finely chopped
Garlic - 2 No's finely chopped
Ghee/ Vegetable Oil - 3 Tbsp
Mustard Seeds - 1 tsp
Cumin Seeds - 1/4 tsp
Split Urad Dal - 1/2 tsp (Optional)
Split Gram Dal - 1 tsp (Optional)
Cashew nuts or Peanuts -  1 tbsp (Optional)
Cilantro/Coriander leaves - 1tbsp chopped (Optional) -avaoid if you dislike its taste.
Ghee - 1 tsp (Optional)
Salt to taste.


And the secret ingredient -
Cooking cream or Whole fat boiled - Milk - 1 cup 

Method 

* Dry roast  Rava in a heated Kadai/Pan for 5 minutes in medium heat, transfer roasted rava to an other plate.

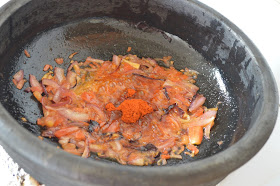
* Heat Ghee/Oil in the kadai, add mustard seeds and allow to splutter, then add cumin seeds and the grams - Urad dal & Gram dal (if using), saute for a minute and add Ginger, garlic and chilies, followed by onion, carrots and Beans (If using) saute in medium heat for 5-10 minutes till the vegetables looks almost cooked.

* Then add Cashew-nuts/Peanuts (If using) , cilantro (If using) and tomato, cook for another 2- 3 minutes stirring vigorously

* Pour 2 cups of water to this and add salt , then pour 1 cup Heavy cream or  whole fat Milk, allow to boil.

* Add 1 tsp of Ghee (optional) to the boiling water + milk and slowly add in the roasted Rava, keep heat to medium-low and stir it while it gets slowly thickened.

*When the Rava looks soaked with the water and it starts to thicken a bit, switch off the heat and allow to get cooked and thicken with the heat within it for 2-3 minutes.


* Serve this creamy, delicious Upma immediately while its still hot, with ghee and Sugar.


Notes :

I like my Upma to be soggy, so I added 3 cups of liquid for 1 cup of Rava, In Kerala Upma is made dry with less water and its enjoyed with Banana/Plantain and sugar.
If you need it dry add just 1 cup water and 1/2 cup Milk or cream (if adding) , and cook the same in low heat stirring vigorously till the Upma looks dry.

*Do try adding milk as it gives a very creamy texture and flavor to the Upma, but do add boiled milk only if using.


Cheers
TN 

Friday, November 20, 2015

Achappam (Kerala Rosette Cookies)


My pregnancy this time reminded me of many things that I loved to eat while I grew up. Fried Sardine-eggs , Jackfruit & many snacks made with the it & Indian Coffee House special "Masala Dosa"
I am grateful to all my dear friends who brought special food for me all these 8 months, I didn't miss my home much because of you guys  & am so glad that I have you all :)
Since Achappom is my all time favorite snack decided to try making it , I haven't made it before. 
Glad it came out really good for me, though It didn't come out well the first batch was wasted. Correct temperature of Oil and Achu/ mold is the key. 


To make "Achappam" you'll need this special "Achu" specially designed mold, I brought it from Kerala,  but it came out really well, these are available in Amazon, there's variations of these and Non stick varieties too which would be great especially if its your first try 


Yes , again it tested my patience initially while frying'em, but was determined to make it alright until I mastered some tricks while making the same,


Temperature of the oil while frying, getting  used to some "not so good" properties of Iron mold "Achu" , the consistency of batter etc are important, we learn with experience, may be I found it difficult because I haven't seen the way its made.
But I must write it tasted better than any Achappam that I had anytime in my life :)


Please note the lines given in "Bold" in the description given below, if planning to make these. 

Ingredients 

Rice flour - 2 cups
Maida / All purpose flour - 1 tbsp (Optional)
Thick Coconut Milk - 3/4 cup (Approx, adjust as per need)
    (may use full fat Cow's milk too though its not used traditionally)
Egg - 1 small beaten
Sugar - 3/4 cup
Black Sesame seeds - 1 tbsp
Cumin seeds - 1 tsp
A pinch of Salt

Oil for frying

Method 

* Mix all ingredients listed above for the batter, in a bowl , adjust the quantity of coconut milk to make batter thin in consistency, thinner than Dosa batter (or pan cake batter). Keep this for 20 to 30 minutes.

* Heat oil in a deep wok or saucepan, dip and keep the "Achu" Iron mold in the oil while its gets heated (at least for 5 minutes) until the oil and the "Achu" is really hot, bring down the heat to medium high.


* Transfer a small amount of the batter to another steel or aluminium bowl, so that each time you dip the hot "Achu"in to the batter, it doesn't make any changes to the whole batter, also its good to make these in batches especially if making these for the first time. You may make any changes to the next batch if its not coming out well with the first attempt.


* Check if the oil is really heated by frying few drops of batter in to the oil and it should bubble up fast. Once the oil is ready, take out the "Achu"/Iron Mold from the oil, shake off excess oil from the "Achu" and dip it to the prepared batter, immediately drop this "Achu" to the oil.
Do not dip the whole Achu/iron mold into the batter , then the batter wouldn't come out of it while frying. 

* Once the Achu/iron mold is in the oil, wait for few seconds and then shake it lightly so that the Achappam comes out of it and gets fried, turn to the other side after few more seconds. Should be light brown in color on both sides.
If the Achappam doesn't get separated from the mold, use a fork to help separate it slowly,

* Ensure that the Mold/Achu is really hot every time you dip it to the batter or else the batter wouldn't get stick to it, also shake off excess oil from it before dipping the same in to the batter each time, its good to keep the Achu/Mold dipped in the heated oil after each Achappom is made, so that its temperature is maintained.Fry the rest of the Achappam's similarly.


* These Achappam's would be soft just after frying , place the fried Achappam's on to a tissue-paper and allow to cool and get crispy. Once cooled, transfer'em to an air tight container or Ziploc bag, it stays for a few weeks.

 Enjoying Crispy Achappoms
:D

Notes : Please note the lines given in "Bold" in the description above if planning to make "Achappom"

Cheers
TN


Wednesday, November 11, 2015

Home made (Yellow) Jalebi Recipe & Happy Diwali


Since India is celebrating one of her biggest festival "Diwali" today,
I was determined to make some thing sweet, which is compulsorily made in all houses celebrating "Diwali" This being my second Diwali after I started blogging in full pace, I decided to make Yellow Jalebi" making of which is little tricky I must write :/
and am not very satisfied by the way it looks :(
last year I made Boondi Ladoo, which I felt was far easier to make.
To make these all you need is patience, but am sure If I can make it, any body else can do it easily :D
as I believe I am among the list of impatient people,
though am trying to improve :(


Referred many blogs and you-tube links before making these,
found the recipe in vegrecipesofindia.com  very descriptive, click link for her Jalebi recipe.
I made some changes to the recipe above to reduce the fermentation time.


Here's how I made it.

Ingredients 

Maida/All purpose flour - 1 cup
Corn flour - 1 tbsp
Besan /Gram flour - 2 tbsp
Fast acting Yeast - 1/2 tsp (Optional, instead use Soda powder)
Sugar - 1 tsp (use only if using yeast)
Salt - a pinch
Turmeric Powder - 1/4 tsp
Thick curd - 1/2 cup
Water - 1/2 cup + 2 tbsp (Approx, I used 2-3 tbsp more)
Oil - for frying

For Sugar syrup 

Sugar - 2 cups
Water - 2 cups
Lime juice - 1/2 tsp
Cardamom or  saffron threads - few

Method 

Optional -   * Heat 2 tbsp water till warm and add 1 tsp sugar to it, mix well and then add yeast, keep for 5 to 7 minutes in warm place to activate yeast. This step is for those who intend to use Yeast, may add Soda powder instead.

   * Mix together Maida + Besan + Corn Flour + turmeric powder + curd + 1/2 cup water+activated Yeast mixture (if using)  Mix well using a spoon for 4-6 minutes until the batter looks smooth (not too thick not too thin in consistency) If using Soda Powder instead of yeast, add it just before frying.


*  keep these for fermentation for at least 6 hour's, (taste best if kept for longer time)

Batter after its kept for 6 hour's to ferment. 


* To make Sugar syrup, boil water and sugar, to bring it to one string consistency, when it reaches the required thickness add lime juice & crushed cardamom. May add color or Saffron to this syrup, saffron would give a light yellow color naturally, but I didn't have the same so used color, which made my Jalebi look brown :(

* Heat Oil in a frying pan, bring to  high heat initially then turn the heat to medium-high heat, temperature of the oil determines how your jalebi's would look like (color and shape) as its hard to make those shapes if the oil is really hot, hence regulate the temperature accordingly.

* Beat the batter once again,add 1 to 3 tbsp water to the batter if it looks thick after fermentation (Batter shouldn't be too thin) transfer'em to a piping bag/ or use any squeezable ketchup bottle's,try piping'em to a paper before frying. Start frying the same 2 to 3 minutes on both sides, I like my jalebi's to be little crispy so I fried it for little more time.

* Making perfect round shapes for these jalebi's was not easy, but after frying few shapeless jalebi's,
I learned the trick, anyways shapeless jalebi's also taste equally good so its fine ;)

* Dip these fried Jalebi's in sugar syrup for 1 to 2 minutes and place them on to a flat plate. If planning to keep for more days, store in air tight containers and refrigerate.


Enjoy !


Wishing you all a very Happy and Blessed Diwali :)

Cheers
TN


Wednesday, October 21, 2015

Vegetable Pulao Recipe ( Veg Pilaf)


Orange tint and scent of pumpkin pie "Fall" is here & am loving this time of the year like never before, enjoying the rain which I missed this year.
Hope all in US is getting ready with kids for Halloween. I have 4 large pumpkins here :(
that's how Dad pamper their kids :/
now its my turn & NA already started nagging to start carving :(
Anyways that's a fun thing to do with kids.....Love it when I see her eyes sparkle with excitement.

Here's a picture of one that I carved last year.

NA excused that asymmetrical face, was convinced with a happy looking Witch :D


Busy days with my in-laws who are here for a month, roaming in and around Salt lake and exploring new places here is of-course fun,though I miss my blog :(
A good DIL is not supposed to serve experimented dishes's to her in-laws was my Mom's advice, so today I made something which I am confident in making, a very popular Indian rice dish, more popular in the Northern states of India.


Everyone would have their own way of making it, I usually pressure cook it to save time. But if you are fast in cutting vegetables, a scrumptious meal is ready under half an hour.

Recipe here doesn't need a pressure cooker though you may cook it in the same if you wish.
Pressure cooked Pulao/Pilaf is my favorite for some reason, though it wouldn't give you that appealing look.

Ingredients 

Basmati Rice (Long Grain Rice) -  2 cups
Ginger and Garlic paste/crushed - 1 tbsp (together)
Onion - 1 medium chopped
Mixed vegetable's - 1 cup chopped  (carrots,beans ,peas ,cauliflower etc)
Tomato - 2 large chopped
Green chili's - 4 to 6 no's (Use as per your preference)
Cilantro chopped - 1/4 cup
Mint Leaves chopped - few springs (Optional)
Juice from 1 lime
Water - 4 cups - double the amount of rice taken (differs with variety of rice used)
Salt to taste
Vegetable Oil / Ghee - 3 tbsp

Whole spices 

Cumin Seeds - 1 tsp
Cardamom - 2 no's
Bay leaves - 1
Cloves - 3 no's
Cinnamon stick - 1/2 inch size piece

To Decorate (Optional)

1 medium size Onion, sliced and fried to golden brown color
1 Tbsp each Cashew nuts and Raisins (I didn't use)


Method 

* Soak Rice in water first before starting to cook. Heat oil in a pot / Pressure cooker or rice cooker.

* Add to the heated oil lightly crushed whole spices (given above) add then Ginger-Garlic paste and saute for a minute, followed by chopped onion.

* When onion looks golden brown, add the other vegetable's and half portion of the chopped tomatoes.

* Saute the vegetables for 2- 4 minutes and then add the drained rice, continue stirring for another 5 minutes.

* Add in the leaves (Cilantro and Mint-if using) and stir to combine. Add salt , lime juice, the rest of the chopped tomatoes & water.

* Cover and cook the same in low heat (if using an open pot) till  the water is absorbed and rice is cooked. Do stir rice in between to check if the water is enough, sprinkle water in between if necessary.

* Once the rice looks cooked, let this sit for 5-7 minutes (Keep this open) , then use a fork to fluff up the rice.Decorate with fried Onions, Cashew-nuts and Raisins.


*  Serve Pulao/Pilaf  hot with Raita, Mint Chutney, Pickle and/or any Curry.


Notes 

  * If using a pressure cooker, cook till 1 whistle heard, immediately transfer the cooker to a cool place, once the pressure is released open the lid and use a fork to fluff up the rice, transfer rice to a flat tray/dish and keep this open for 5 to 7 minutes before serving.

Cheers
TN


Monday, September 14, 2015

Dragon Chicken (Indo-Chinese Recipe)


Its September again, this is the first time that I am happy to welcome this month since the time I started realizing that I am getting old, as this is the month that completes one another year of my life on earth.But I want time to fly with this same pace till another 3 months as am waiting for a surprise the Almighty is molding inside me :)
Another reason for my happiness this month is the happening of State fair and Cultural Fair's, marking the end of Season....
Like last year this time also did I participate for a Honey Recipe Contest, baked some Baklava Rolls for the same and went to the fair ground with no much confidence as Baklava is not really an accepted dessert by the American taste buds :)
But this was One name which came into my mind when thinking of a dish with Honey, honey glazed chicken was the next option, though I decided to go ahead with Baklava & ended up tasting 5 other variety Baklava's the other contestants presented, the fun part was that none of the Baklava entries won any prize :D
Anyways glad that my NA didn't cry after hearing the result, I expected the same to happen, as I saw her super happy, jumping with excitement not minding her surroundings when my Cream cheese filled Chcocolate Cupscakes in Chocolate Cups won 2nd prize for a Cup cake contest in the same venue last year.

I console myself thinking that participation is the best part and winning is just the next level ;)


May be its the wish of the lil-one getting baked inside my tummy, that I crave extraordinarily for some specific dishes which I sometimes dream in my deep sleep, and this day its "Dragon chicken"
I have had it couple of times from some restaurants in Mumbai, the reason why its called "Dragon" might be because of the bright red tint the dish would have and that long strips of chicken pieces.

Do give it a try if you like Indo chinese dishes, a mixture of Indian ingredients to a typical Chinese recipe.

Here's how I made it

Ingredients 

For shallow frying 

Chicken Breast - 2 medium Breast pieces(cut in to long thin strips)
Soy Sauce - 2 tsp
Kashmiri Red chili powder (Or paprika) - 2 tsp (Adjust as per your preference)
Salt - to taste (Use less as all the sauces used here would have salt in it)
White Pepper powder - 1/2 tsp (More or less)
Chili Sauce (I used Homemade Chili Garlic sauce- Recipe given below)  - 1  tbsp
Corn flour - 2 tbsp
Oil - for frying (2 to 4 Tbsp Approx)

Other Ingredients 

Onion - 1 medium - thinly sliced)
Whole Red chili's - 2 to 3 no's (crushed)
Paprika or Kashmiri Red chili powder - 1 tsp (Or more)
Garlic - 2 to 4 No's - chopped
Ginger - a small piece finely chopped
Green or Red Bell Pepper (Capsicum) - thinly sliced.
Cashew Nuts - few no's
Green Onion - few tbsp's chopped (Optional)
Soy Sauce - 1 tsp
Chili Sauce (or home made Chili Garlic Sauce) - 2 tbsp
Tomato Sauce - 1 tbsp
Sugar - 2 tsp (Use more if you like this dish less spicy)
Salt to taste - Use only if required  (as all the sauces would have salt in it)


For Homemade Chili Garlic sauce - soak 6 to 8 whole red chili's and 3-5 Garlic pieces in 2 to 3 tbsp vinegar for 15 to 30 minutes, blend the same using a small blender to make a sauce,this would have thin consistency when compared to the store bought Chili sauce but would definitely taste better.
this isn't stored for more than a day since it doesn't have any heating. I make it in small quantity usually for the preparation of certain Indo Chinese Dishes.


I prefer making chili garlic sauce at home as it gives a slight tangy flavor to the dish with the addition of vinegar, hence if you are using store bought chili sauce, add few drops of vinegar or lime juice to the recipe here - Only if you like slight sour taste in your dish :)
 (This is entirely optional as its not included anywhere in the original recipe )

Method 

* Marinate the chicken pieces with all the ingredients given under Frying except corn flour for 10 to 15 minutes. Heat Oil in a Non-stick pan (as we haven't used egg for binding, this tends to stick) sprinkle corn flour to the marinated chicken (for coating)  just before frying the same.

* Shallow fry the marinated chicken pieces till its all cooked and looks golden brown in color. 
Remove from heat.

* In the same pan with the left over oil (Remove some oil if it seems excess), add garlic first to induce its flavor to the fried oil, followed by ginger, sliced onion & dry whole chili's ,  saute the same till brown (should be nicely done) then add the fried Chicken pieces & sliced bell pepper's to it,cook stirring the same for 2-4 minutes.

* Add Paprika (Kashmiri Powder) , Cashew nuts , all the sauces and salt (If required) and stir fry for another 5 to 7 minutes until everything is coated nicely to the chicken pieces. May sprinkle some water (if you think that the dish is looking dry) 

* Finally add sugar, stir again and switch off the heat. Serve topping the dish with some chopped spring-onions.


Enjoy with Fried rice or any Noodle's. 


Notes :

In all the original recipes the chicken pieces are deep fried, I decided to shallow fry the same and use the same oil to make the gravy. Hence you may deep fry the chicken pieces to make it nice and crispy.

Use a Non stick pan to fry the chicken pieces as this recipe doesn't add egg to the marinade which creates a binding. If not using a Non stick pan to shallow fry, use half of 1 egg to give the chicken pieces nice coating.
(I didn't use egg here as it tends to make the batter/marinate little loose in consistency and would need more corn flour)

This dish is slightly spicy (Home made chili garlic sauce makes it more spicy) hence use less red chili's for the sauce (if preparing at home) to make it less spicy.


Cheers
TN

Thursday, August 27, 2015

Happy Onam , Cherupayar Payasam Recipe


When I was a kid,the most exciting thing during Onam was to collect flowers to make Pookalam (Flower Carpet), now that I am grown up, it has been replaced by the preparation of Sadhya (Feast), there was a time in between when I was in my teens that I used to wait for Onam only because I could wear Kerala Set-Saree - which is slightly different from the normal Saree, dress like a "Malayalee" (Keralite)

Onam is a festival beyond any religious boundaries ,though the believes related to the same and the traditions are typically followed by the Hindus in our place, but most of our homes would have a Sadhya (Feast) prepared on that day & also would have a "Pookalam" (Flower Carpet) in front of our house.
I wish I was in Kerala,I could  help my NA make a "Pookalam" &  make Sadhya, sit with my family and enjoy the same after which we would lie down watching TV as all you can do after this grand  feast is to just rest :D

Here's a video I made :)

Photo Courtesy - Sadhya Pic www.hungryforever.com
                          - Pulikali Pic http://www.flickriver.com
                          - Pookalam Pic http://webneel.com

Following are links to some of the recipe's of Side dishes posted in this blog , which are usually prepared for Sadhya - yet to post all the side dishes for a Kerala Sadhya :( 


Mathanga Erissery
Olan  (Central Kerala Style)
Kalan
Thoran with Cabbage or Cauliflower 
Mezhukkupurattiathu With Achinga Payar /Long Beans 
Paalpayasam - Rice Payasam


Sharing  a very special Kerala Dessert recipe , made during all festive occasions
"Cherupayar Payasam"
To be honest I haven't made it much,as someone in my family doesn't appreciate it :(


I miss that Dark Brown color in my payasam here, which is possible only with the extra brown Jaggery/Brown Sugar or Palm sugar that we get in our place.


Ingredients 

Cherupayar/ Green Gram - 3/4 cup 
I made it with whole gram instead of split gram & used a pressure cooker to make it easier.
Jaggery/Raw Brown sugar/Sharkkara - 1 and 1/2 cups ( used about 7 pieces) 
Thick Coconut Milk (Onnampaal) - 1/2 cup to 3/4 cup 
Thin Coconut Milk (Randampaal)  - 2 - 3 cups (I made it with store bought coconut milk, diluted the same  with some water) 
Dry ginger powder/ Chukku podi - 1/4 tsp
Cumin powder - a pinch 
Coconut pieces - 2 tbsp 
Cashew-nuts & Raisins - 2 tbsp (more or less) 
Cardamom -  4-6 no's crushed. 
Ghee/ Clarified Butter - 1 to 2 tbsp

Method 

* In a pressure cooker, heat some ghee(2-3 tsp), saute Green gram's in this for 4-6 minutes in medium heat, let cool for sometime (10 -15 minutes) and give this a pulse in the blender. (Do not powder the same, it just needs to get broken lightly) 

* Pour Thin coconut milk (Randampaal) to this shallow fried Green gram & cover with the lid, wait for 2 whistles and switch off the heat. Allow to cool for some time.

* In the mean time, melt Jaggery with some water (1/4 to 1/2 cup) water , strain and keep aside.
I use the microwave to melt the same,it is much easy to melt it this way. 

* Once the pressure is gone, add the melted Jaggery and bring to boil, add crushed cardamom, Dry ginger powder(Chukku podi) & a pinch of cumin powder. 

* When the payasam reaches the required consistency, add the thick Coconut milk and switch off the heat.(It is better to make it thin as this tends to become thick when allowed to sit for a while) 

* In another pan, heat the rest of the ghee, fry Coconut bits, then add cashewnuts and,raisins,fry till everything looks brown.Add this to the prepared Payasam and Serve.  


Enjoy :) 

Notes :

I made this payasam initially by mixing jaggery/sugar & pulses together but payar/Green gram didn't get cooked even after pressure cooking the same for 3-5 whistles, that is the science I haven't learned ;)  Addition of sugar delays the cooking process. 
  Hence while preparing Payar Payasam, add sugar/Jaggery only after its cooked in Milk, that's how its done :) 


Now that Sadhya is the main attraction, sharing with you few tips that I learned from my mistakes, am sure I have much to learn while preparing a grand Sadhya :)


  •  Different vegetables have varied cooking time, while cooking recipes with the combination of root vegetables and other vegetable's (with less cooking time) like Kalan, Avial, Sambar  etc , care should be taken when you cut the vegetable's, let the root vegetable's be little bigger in size than the other vegetable's.
  •  I made an Alleppey style Errishery last week and was very disappointed with its taste, as this is one dish I will ask my Mom to make when I am at home and it never tasted this bad :(  After researching I realized that the vegetable's weren't cooked properly. Flavors of vegetable's get released only if it is cooked nicely for certain dishes (Errisheri, Kalan etc) the vegetable's need to be nicely cooked and mashed, then alone would it contribute to the authentic taste.
  • Salt shouldn't be added initially to those dishes which need legumes (Pulses, like sambar, Errisery, Parippu Curry etc) as the addition of salt to the legumes/Pulses would delay its cooking process. Hence add salt only after cooking pulses well, also some starchy vegetable's (Chena / suran , Kaya /Raw banana etc) also tend to have the same property. 
While all other Vegetable's like Onion, tomato's, cucumber - those vegetable's which has more water content in it tend to cook faster when salt is added to'em.

  •  Cook and keep dishes like Rasam , Inji puli etc , a day before the Sadhya as it taste best when its allowed to sit for some time. Also if you are inviting people for sadhya, its better to cook and keep the legumes/pulses/Parippu for parippu curry, sambar etc a day before, this would make cooking easier.
  •  Do not cook vegetable's for more time after the addition of ground coconut and curd. This is the first thing everyone learns while preparing any dish with coconut, as high temperature tends to curdle and would contribute a "not-very pleasing texture"  :)  
  •  Make dishes with Coconut Oil for all Kerala Sadhya dishes as everything tastes authentic only with Coconut oil in it :). 

Also addition of Coconut pieces for Mezhukkupurati (Payar, beans etc which doesn't need grated coconut) would make it extra rich and flavorful.

  •  Do not forget to store Dry red chili's, curry leaves, coconut pieces while planning to prepare Sadhya, as it plays a major role in seasoning  the dishes. these not only contributes to the look of the curry, also gives extra flavor's and makes the dish complete. 
  •  While preparing white payasams, take correct measurements of Semiya, rice etc as the addition of more would make the Payasam thick and ruin the dessert. Hence take accurate measurements while make the same.
  •  While preparing Payar Payasam, Rice Payasam etc, add sugar/Jaggery only after the rice, Payar etc is cooked in Milk (at last) as the addition of sugar  initially delays the cooking process. Add less sugar initially and the rest after everything is nicely cooked. 

Wishing you all a very Blessed and Happy Onam :) 

Cheers
TN 


Wednesday, August 12, 2015

Goan Fish Curry with Ground Coconut


We have a Goan friend "Richie" who's a chroooonic  bachelor ;)
A typical Goan who loves food and cooking. We were lucky to have him as guest once when we were just married , he taught me about Goan food, also shared some useful tricks in kitchen, during his 1 week stay.
He's one of a kind "Party Man" I must say, who led a life I haven't even imagined till then. He follows a unique lifestyle by starting his day very healthy,an hour or two he would spent for jogging , exercise , Yoga and good Break fast then enters the kitchen to start cooking but he could do it only with the help of  his cocktails hence by the end of the day he's not very healthy ;)
I must thank him for the friendliness and the way he took over my kitchen, the food and flavors he created was amazing.
 Thanks to Richie, glad that he's now the first person whom I would call when ever I think of preparing a Goan specialty dish.

This Goan specialty Fish curry with coconut paste is one of the dish that he prepared,
I fell in love with its flavors the first time I had it.
Recipe is similar to the Kerala Fish curry with Coconut gravy, but the addition of some spices like whole coriander seeds, dry red chili's & pepper corns make it extra flavorful.
A must try recipe for all those who are fish lovers like me.


I used Salmon here but King fish or Pomfret would be the best, if its available in your place.

Ingredients 

Fish - Salmon 1 pound (Approx) sliced or cubed
Tamarind / Sambar -puli - 1 and 1/2 tbsp
* Mango 1 whole sliced  or Tomato (1/2 finely chopped )- (Optional)  adjust the sour taste as per your preference, add more tamarind if you aren't using mango or tomato slices here.
Onion -  1 small - sliced
Oil - 2 tbsp (I used Coconut oil)
Green chili's - 2 no's slit
Salt to taste
Turmeric Powder - a pinch (or more)
Kashmiri Chili Powder - 1 tsp

Grind to Paste 

Coconut - 2 cups
Shallots - 5 to 8 no's
Coriander seeds - 1 tbsp
Cumin seeds - 1 tsp
Pepper corns - 4 to 6 no's (Do not use more)
Dry whole red chili's - 6 to 10 no's (Adjust as per your preference)
Ginger -  small piece
Garlic - 3 no's
Turmeric Powder - 1/2 tsp
Methi seeds (Fenugreek seeds) - a pinch
Salt & little water to grind.


Method 

* Clean and slice Fish, rub the same with a pinch of turmeric powder and salt. Keep aside.


* Grind to a very smooth paste the ingredients given above for grinding.


* Heat 2 tbsp oil in a Madka or any Kadai/pot , saute sliced onions & finely sliced tomatoes (if using)    Add Kashmiri Red chili powder when the onion looks brown.


* Then add the nicely ground coconut paste, and cook until the raw taste of ginger and garlic is gone (almost takes 10 to 15 minutes in medium heat) cover and cook this as it tends to bubble and decorate the surroundings ;)  stir in between.
Add little water if it tends to stick to the bottom.


* When the paste is completely cooked and the oil starts to separate add 1 cup water(give or take)  and add thetamarind pulp (or tamarind diluted with little water) & slit green chili's , allow to boil.

* When the gravy starts to boil, add marinated fish and *mangoes (if using) Allow to cook for 5 to 7 minutes until the fish is completely done.

Switch off the heat and let rest for 2 to 4 hour's (if possible) as fish curry taste best when its allowed to sit for sometime.

Serve with steamed rice.


Enjoy !

Cheers
TN